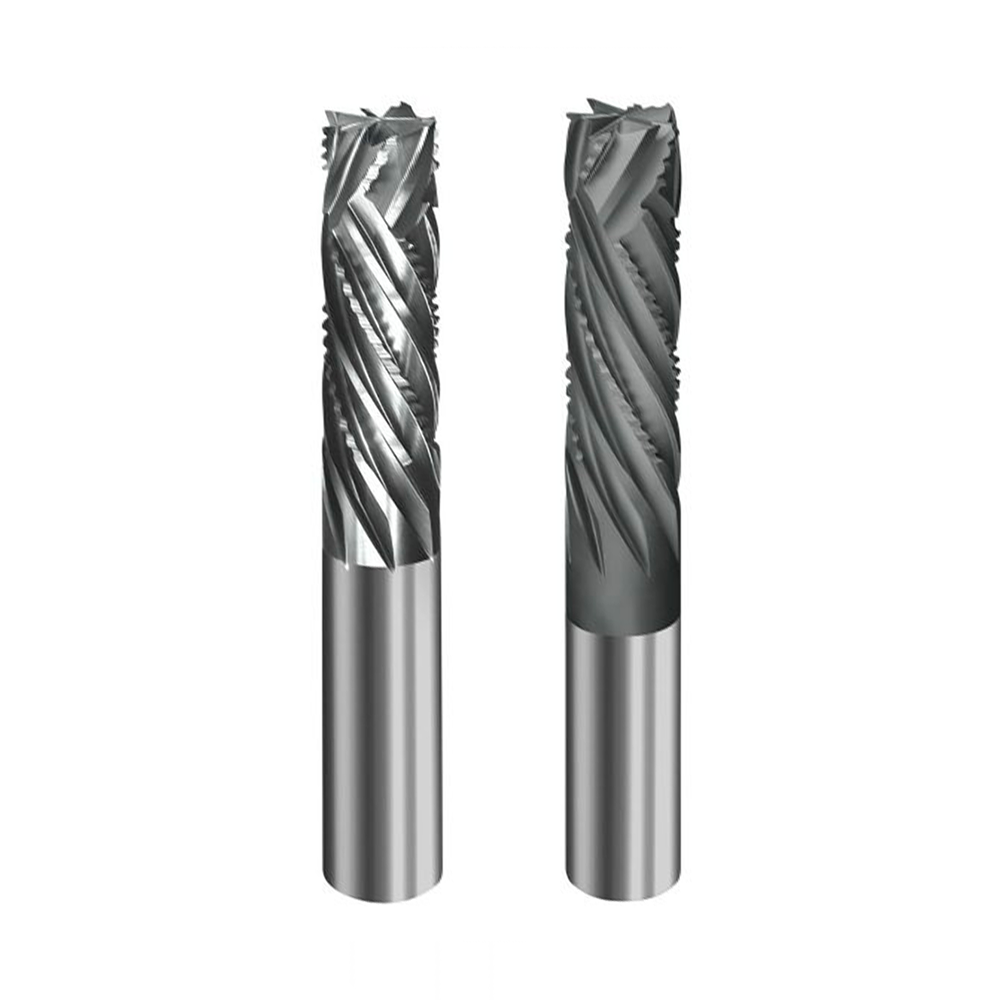
Router bits are consumables, but they are not disposable. In a professional CNC environment, a bit maintenance routine is one of the simplest ways to protect cut quality, improve repeatability, reduce scrap and lower your cost per part. It also prevents a very common time sink: chasing settings to compensate for tools that are dirty, worn, or poorly held.
This guide focuses on practical, workshop-friendly maintenance for CNC router bits and tooling, including inspection routines, cleaning, storage, sharpening decisions and the toolholding basics that underpin performance.
Why bit maintenance matters in production
When a bit starts to fail, the first symptoms are often subtle:
- Edges go from crisp to slightly fuzzy
- Burn marks appear intermittently
- Corners chip on veneered boards
- Cycle times creep up because you slow feeds to “get the finish back”
- Your machine sounds different, even though nothing has changed in the program
Left unchecked, those small changes lead to measurable costs:
- Higher scrap and rework rates
- Slower throughput
- More broken tools
- Inconsistent dimensions from deflection and runout
- Increased spindle and toolholder wear
Good maintenance is not just about longer tool life. It is about stable, predictable output.
READ: Choose The Best Router Bits By Material – A Guide
The three main failure modes of CNC router bits
Edge wear and rounding
A sharp edge shears material cleanly. A worn edge rubs, heats and tears.
Common symptoms:
- Burning on timber and MDF
- Fuzzy edges rather than clean shear
- More force required to cut, increasing deflection and chatter
- Poorer dimensional control on finishing passes
Typical causes:
- Abrasive materials (MDF, laminates)
- Rubbing from chip load that is too low
- Resin build-up that prevents the edge cutting properly
Micro-chipping
Micro-chips are small fractures along the cutting edge, often invisible without magnification.
Common symptoms:
- Chipping and breakout on veneers and laminates
- Rough edges that do not improve with minor feed tweaks
- Inconsistent finish that comes and goes along the cut
Typical causes:
- Brittle surface layers (melamine, veneer, HPL)
- Vibration and runout
- Impact damage from storage or handling
- Aggressive tool engagement at corners
Build-up and contamination
This includes resin and glue build-up in woodworking and chip welding (built-up edge) in plastics and aluminium.
Common symptoms:
- Burning, even with “correct” settings
- Noisy cutting
- Smearing on plastics
- Burrs and poor finish in aluminium
Typical causes:
- Inadequate extraction or chip clearance
- Heat from rubbing
- Inappropriate flute count or geometry for the material
READ: CNC Router Bits 101: What Is A Router Bit And How Does It Work?
A practical inspection routine that fits professional workflows
The best routine is the one your team will actually do. A simple, repeatable schedule is more valuable than a perfect system nobody uses.
Per tool change or per job (30 to 60 seconds)
- Check the cutting edges for obvious chips and rounding
- Check for resin, glue, or welded material on the flutes
- Check the shank for scoring, rust, or debris
- Confirm the tool is the correct type and diameter for the material and strategy
Daily (end of shift)
- Wipe and inspect tools used that day before storage
- Clean any tools with visible build-up before it hardens
- Quickly inspect collets and nuts for contamination
Weekly
- Inspect high-use tools under magnification (a simple loupe is enough)
- Check toolholding components for wear (collets, nuts, toolholders)
- Review your tool life notes: which tools are failing early and in what materials
Monthly (or by hours/metres cut)
- Pull high-impact tools for a deeper check and planned resharpening cycle
- Check runout if you have recurring finish or tolerance issues
- Audit storage: are tools getting knocked or mixed up in drawers
What to look for when inspecting a router bit
A quick visual check is useful, but a basic magnifier makes maintenance far more effective. Look for:
- Dull, shiny edge lines where the cutting edge should be crisp
- Micro-chips on the edge, especially on compression and laminate cutters
- Flute damage and nicks from accidental knocks
- Resin build-up that narrows flute space
- Discolouration that suggests heat damage
- Shank scoring or marks that suggest slipping in the collet
If you see consistent scoring on shanks, treat that as a toolholding warning sign. It can indicate slip, contamination, incorrect sizing, or overtightening.
Cleaning router bits properly
Cleaning is one of the highest-return maintenance tasks, especially in timber routing. Resin and glue build-up can turn a sharp tool into a heat generator.
Cleaning for wood, MDF and sheet materials
Typical contaminants:
- Resin from softwoods and some hardwoods
- Glue and adhesive residue from sheet goods
- MDF fines baked onto the flute from heat and poor extraction
Practical approach:
- Remove the tool safely and isolate the machine as required by your process.
- Use a cleaning method designed for resin and adhesive build-up (follow the product guidance and your site COSHH procedures).
- Use a soft brush to remove softened build-up from the flutes.
- Rinse or wipe thoroughly and dry completely before storage.
What to avoid:
- Wire wheels or aggressive abrasives on cutting edges
- Scraping the cutting edge with hard tools
- Leaving tools wet or chemically coated without drying, which can encourage corrosion
Cleaning for plastics and aluminium (built-up edge)
In plastics and aluminium, the problem is often chip welding. You may see smeared material on the cutting edge.
Practical approach:
- Remove the welded material with an appropriate cleaner and a non-damaging brush
- Check the edge under magnification after cleaning
- If the edge still looks rounded or chipped, cleaning will not restore performance
Prevention matters here. Polished flutes, correct chip formation and good chip evacuation reduce the chance of build-up returning mid-job.
READ: CNC Router Bit Maintenance: How To Do It Right
Sharpening vs replacing: a professional decision framework
Sharpening can be excellent value, but only when it restores the intended geometry and the remaining tool length still suits your work.
When sharpening makes sense
- The tool is worn but not chipped
- Flute geometry is intact
- The tool is a standard pattern you use repeatedly
- You have a reliable sharpening service that maintains the correct geometry
When replacing is usually the better option
- The cutting edge is chipped, especially on compression cutters for veneers
- The tool has suffered impact damage or flute fractures
- The shank is scored or damaged
- The tool has already been sharpened to the point where flute length and performance are compromised
- You need absolute repeatability for a finishing operation and variability is costly
Special case: compression bits
Compression tooling relies on a specific geometry to protect both faces of a sheet. Poor sharpening can change where the upcut and downcut sections engage, which can bring tear-out back even if the tool feels “sharp”.
If you sharpen compression tools, be clear on how the service maintains the geometry and what changes to engagement depth you may need.
Special case: PCD (diamond) tooling
PCD tooling works differently to carbide. It tends to be used for high-volume abrasive materials where consistency matters. The maintenance cycle is usually based on planned servicing rather than “run it until it burns”.
If you run a lot of MDF, laminate, or abrasive composites, a planned PCD cycle can reduce downtime and quality drift.
Tool storage and handling: preventing damage off the machine
A surprising number of chipped tools are damaged in storage rather than cutting.
Good storage principles:
- Store tools individually in sleeves, tubes, or dedicated racks
- Avoid loose drawers where tools can knock together
- Keep cutting edges from contacting other metal surfaces
- Label tools by type, diameter, flute count and intended material
- Separate “in service”, “to clean” and “to sharpen” tools so they do not get mixed
If multiple operators share tooling, consider a simple colour or tag system:
- Green: ready to use
- Amber: due for cleaning or inspection
- Red: out of service, needs sharpening or replacement
Toolholding maintenance: collets, nuts and holders
A perfect router bit will still cut badly if the toolholding is dirty or worn. Toolholding is also a safety issue.
Collets are consumables
Common signs a collet is past its best:
- Persistent runout or vibration you cannot tune out
- Visible fretting marks, glazing, or bell-mouthing
- Inconsistent clamping feel
- Tools that slip under load despite correct seating and tightening
- Cracks or distortion
Cleaning and care
- Keep collet slots free of dust and chips
- Clean the nut threads and mating surfaces
- Keep tapers and seats clean, especially on ATC holders
Correct sizing matters
Metric and imperial mismatches are a common source of poor grip and runout. Always confirm the shank diameter matches the collet.
Tightening consistency
Follow the toolholding manufacturer’s guidance. Undertightening risks slip. Overtightening can distort collets and accelerate wear. Consistent tightening improves repeatability, finish and tool life.
Material-specific maintenance guidance
Different materials create different wear patterns and cleaning needs. Adjust your routine accordingly.
MDF
- Abrasive and dust-heavy
- Dulls edges steadily and can trigger burning as tools age
- Demands strong extraction to avoid recutting dust
Maintenance focus:
- Planned inspection and replacement/sharpening cycles
- Keep flutes clean so evacuation stays consistent
READ: How To Choose The Right CNC Router Tool For Cutting MDF
Plywood and veneers
- Brittle surface layers can chip easily
- Micro-chipping shows up as edge breakout and surface chipping
Maintenance focus:
- Inspect edges under magnification more often
- Remove tools from service early if micro-chipping appears
- Protect tools in storage to avoid edge knocks
READ: Top Tips When Cutting Plywood
Solid hardwoods
- Wear is often heat and edge rounding, plus occasional grain tear-out if tools are tired
- Finishing passes reveal tool condition quickly
Maintenance focus:
- Keep finishing tools on a stricter schedule
- Avoid pushing dull tools, because the finish will drift and dimensional accuracy will follow
READ: What Are The Best Tools For Cutting Wood?
Softwoods
- Resin build-up can appear quickly
- A tool can be sharp but still cut badly if it is dirty
Maintenance focus:
- Frequent cleaning
- Avoid letting resin bake on through heat and poor chip clearance
READ: What Are The Best Tools For Cutting Wood?
Plastics
- Chip welding can build quickly
- Smearing and burrs can appear as soon as adhesion starts
Maintenance focus:
- Clean build-up early
- Review tool selection if adhesion is recurring
READ: What Are The Best Router Bits For Cutting Plastics?
Aluminium (router-appropriate work)
- Built-up edge is a frequent cause of finish collapse
- Tools may look fine until the edge is welded
Maintenance focus:
- Clean welded material promptly
- Keep toolholding clean to reduce runout and uneven flute loading
READ: What Are The Best Aluminium Cutters?
Extending tool life through correct use
This article is not a feeds and speeds manual, but there are a few usage habits that directly affect maintenance outcomes:
- Avoid rubbing: chip formation should be healthy, not dusty and polished
- Keep stick-out as short as practical to reduce deflection and edge abuse
- Use roughing and finishing where finish matters, so the finishing pass is gentle and consistent
- Avoid trapping chips in deep pockets, particularly with downcut tools
- Maintain extraction performance so chips are not recut
If your tools consistently wear faster than expected, it is often a sign of rubbing, recutting chips, or vibration rather than “bad tooling”.
Troubleshooting: symptom to maintenance action
| Symptom | Most likely tooling issue | Maintenance action | Also check |
| Burning on wood/MDF | dull edge or resin build-up | clean, then inspect; sharpen/replace if rounded | chip evacuation, rubbing from too low chip load |
| Fuzzy edges in timber | edge wear or contamination | clean and inspect; replace if rounded | tool geometry choice, stick-out, vibration |
| Veneer chipping | micro-chipping on edge | remove tool from service; replace or specialist sharpen | runout, entry/exit strategy, support |
| Chatter marks | runout, collet wear, excessive stick-out | clean toolholding, replace collet if needed | workholding, tool engagement, machine condition |
| Plastic smearing | chip welding and heat | clean build-up; review tool suitability | chip evacuation, rubbing, polished tooling |
| Aluminium burrs worsen mid-run | built-up edge forming | stop and clean; inspect edge condition | evacuation, lubrication/air assist, flute count |
A practical bit maintenance kit for a CNC shop
A small kit makes good habits easier:
- Magnifier or loupe for edge inspection
- Soft brushes suitable for flute cleaning
- Cleaning product suitable for resin and adhesive residue (used in line with site safety procedures)
- Lint-free cloths for drying and wiping
- Tool sleeves or a dedicated tool rack with separators
- Spare collets and nuts for your common toolholding sizes
- Labels or a simple logging system for tool life tracking
- Appropriate spanners and a safe tightening process for your toolholding system
Safety notes worth including in your SOP
- Isolate the machine before manual tool changes, following your site procedure
- Handle sharp tools carefully and avoid rushing tool changes
- Follow chemical handling guidance for cleaners, including ventilation and skin protection where required
- Never compromise on toolholding condition; worn collets are both a quality risk and a safety risk
Closing notes
Good router bit maintenance is a system: clean tools, consistent inspection, sensible storage and toolholding care. If you implement even a basic version of this routine, you should see more stable cut quality, fewer surprises and a clearer sharpening and replacement cycle.